Friday, January 1, 2010

Sometimes It Works Out Better Than Expected

I was scheduled to shoot a session indoors on December 30th, 2009. However, a few minutes before I got to the location house, I got a text that basically was a profuse apology. My subject was apologizing for some unwelcome guests in her house that would have interfered with the shoot. So, as time was running out, we decided to just cancel what we had planned and do a shoot outdoors about a mile from her house at a local lake.

I don't generally like this location because it's a half finished lake. What?!?!?! Yes, when this lake was being built., there was a rather large rain storm that came and lasted for days as I am told. It rained so much there are still bulldozers at the bottom of the lake. So you can't water ski or really fish effectively. No scenery. It's really just a lake that people go to to hang out and build houses around.

But, I got some of the most amazing shots I have ever captured because we went with what we had. The light and my subject were AMAZING. I'm looking forward to doing other shoots with her.

Enjoy.


Friday, December 11, 2009

Group Picture Fun

I got the opportunity to shoot my company’s Christmas party Santa pictures. It' helps to have a great Santa and great subjects.


DSC_0253  DSC_0219 DSC_0226 DSC_0236 DSC_0245

DSC_0208

This is the only shot that needs an explanation. There was a choir at the luncheon so I asked this nice young lady to point at the camera. I had a wider angle lens; I wanted to distort the perspective. 

Saturday, December 5, 2009

Fun with clients - Amanda

I got to spend a very chili hour with a wonderful subject - Amanda.
We did a shoot at Joe Pool Lake outside The Oasis restaurant. Amanda was great, at 30 degrees she went shoe and coatless.


DSC_0121  DSC_0125

DSC_0137

DSC_0143 DSC_0075

DSC_0045 DSC_0061d

Wednesday, September 2, 2009

Five Mistakes People Make Taking Pictures

I know this is terribly earth shattering, but there are no perfect pictures. As a matter of fact the more you take pictures the more they seem to look imperfect. What's really happening is that your attention to detail is sharpening. I don't have a knack for detail in my life. I'm a bottom line kind of guy, which is not good if you do detail work. To increase my attention to detail I picked up photography. Among other reasons of course.

Today I wanted to share with you 5 common mistakes to try and avoid when taking pictures. There could be hundreds, but I'll focus on 5.

1. Avoid harsh light or mixed light if possible. In the picture below I shot this with a point and shoot digital camera. I didn't have my DSLR available. I made the error of shooting in partial sun and partial shade. Nary the two shall meet.

If shooting in this situation, try to shoot in all shade if possible. If you can't, move indoors or use something to shade the scene.

Bad shot

Better Shot


2. Shoot the subject. Almost goes without saying, but try to focus as much of what's in the frame on the subject. I see this less and less now that digital is all the rave. Old point and shoot cameras were hard to tell if you had the subject in frame so you backed up to get everything. Unfortunately, you got more living room wall than subject.

Correct this by getting close. If you are going to clip someone's face, clip the top of their head and not their chin. Fill THE FRAME!

Bad shot


Better Shot


3. Shoot from up high if possible. People look better when they don't look down. It has to do with their chin and neck. Most Americans have some weight. Avoid this problem if possible by having them look up. It stretches the neck up.

Bad shot

Better Shot


4. Get in line with the subject. Too many people shoot their children from their perspective. It loses something. Shoot children at their level. It actually helps you experience the picture as the child sees things and adds a level of interest.

Bad shot


Better shot


5. Straight on shots can get boring. Shooting the image in the same direction over and over bores the viewer. Change the angle at which you shoot. You can do this a number of way. My favorite is tilting the camera about 45 degrees.

Bad shot


Better Shot

Thursday, August 20, 2009

How to spice up your pictures

Lots of us take good shots. We do, we just don't know it. What I'd like to tell you is what a number of photographers do to make the pictures they take of you look better. And the better the picture the more sales they get. Right?

I'm going to take you through a sample picture process. That process is referred to as "workflow" in the "bid-ness". Workflow is taking an image and correcting pieces, parts or the whole to get a better finished product. It's what used to be known as "re-touching". Re-touching was difficult in that it dealt with a piece of paper and different airbrushing techniques or very inaccurate methods to correct or hide flaws.

I can't show you everything, but I'll show you a few things I do to make a good picture look better. Keep in mind that if you expose the picture properly and set the subject as the subject and are aware of what's going on in the frame, you usually don't have to do much to the picture. You really try to do as little as possible to the picture. The general rule of thumb is to remove problems BEFORE you shoot. We'll take one image and follow it through 3 things I do to give an image a better look. I'll be using Photoshop to do my corrections.

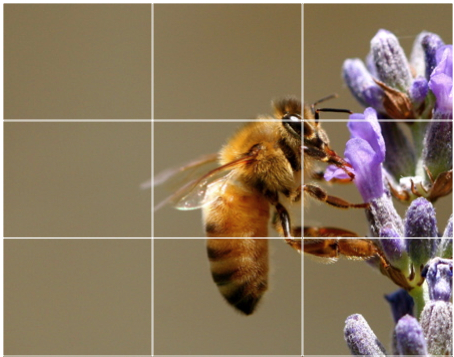
You can use just about any image editing tool. If you can't get your hands on Photoshop, tools like Paint.Net, The Gimp and Photoshop Elements have these basic features. In all of our examples, we will use the photo below. If you would like to download it and try the corrections I demonstrate, you can find it here.

Not a bad picture. The model is nice, the setting is not distracting, but it needs a little work. Let’s do 3 corrections on this image.

  • Color Correction
  • Dodge/Burn
  • Vignette

Color Correction

Let's face it, sometimes the lights or the fates or whatever work against you. Sometimes it can be the color of the subject's skin that can clash with the surroundings. Color correction is a way to get a good balance of rich colors. The first thing I'm going to do is try to correct the colors in this image. They look pretty good, but I want to take some of the yellow out of the model’s skin and balance the purple from the background.

First you open your image editing software and the image and immediately make a copy of the background layer. We always want to be able to go back to the original.

Now that we have a copy of the image ready to work with on a new layer, our first stop is going to be to go to edit the levels. In Photoshop and choose Images –> Adjustments - >Auto Levels. This will balance out the darks and light areas of the image. If you don’t like it choose CTRL + Z or on the Mac Command Z.

Now that our dark and light balance is good, let’s work on colors. I like to start with the Color Balance tool ( CTRL+B or Command+B on a Mac ). Color Balance works colors against each other. In our photo we want to reduce the yellow tone in the model’s skin.

For each setting at the bottom ( Midtone, Shadow and Highlight ) I’m going to bump up the blue just a tad. You;ll notice the wall changes too. If you don’t want to change the color of the wall you would use the Hue/Saturation tool. ( CTRL+U ) We could go on for days like this, but for now I’m going to stick with the Color Balance.


image

Here’s what we have so far. Our model’s skin is less yellow and the wall is a little more purple as it was in real life. We’re already seeing an improvement.

image


Dodge/Burn

Now let’s tackle making the image more attractive to the viewer. What we are going to do is use an OLD technique that lightens or darkens small areas of the image. When you want an area lighter it’s called “dodging”. When you want an area to be darker it’s called “burning”. What we want to do is make the eyes and teeth brighter. Especially the eyes without making them look plastic. All I’m going to do is dodge around the eyes and once over the teeth. Our model has nice teeth and we don’t have to do much to correct there.

Select the  dodge tool,  image

At the top use the following settings as an example.


image

Now, with one pass, click and drag over the darker parts of the eyes:

Before
image

After
image

It’s not much of a difference but it will make the eyes lighter and focus attention on the eyes.


Vignette

A vignette is a way to isolate the subject in a way that mimics a camera darkening the edges of an image. Old images get darker toward the corners. New digital cameras don’t do that. We’ll use the mask tool. I’m not going to explain it too much but give you the steps.

1. Click “enter mask mode” on the tool bar
image

2. Choose the Gradient tool on the toolbar
image

3. Draw from each corner about halfway to the middle of the image.
A red gradient will appear – this is normal. Continue with each corner.
image

4. Click the exit mask mode
image

5. Press CTRL+SHIFT+i ( this inverts the selection )

6. Press CTRL + M
This gives you the curves options. Click about 1/3 of the way toward the top of the curve and drag up until you see some dark areas in the image. It will probably will look something like this.
Before
image
After
image

Click CTRL+D to deselect the areas. You should have something like this.
image

Let’s take a look at the before and after.

Before
image
After
image

Better colors, more focus on the subject.

Thursday, July 23, 2009

Rule of Thirds

I believe in sharing information about photography to my customers and those friends who read. Last time we looked at Depth of Field and how it relates to better pictures. This time, I want to focus on something that will make your pictures look much more artistic - the rule of thirds.

I have no clue why it's called a "rule" but it seems that we like a certain balance or imbalance in our images. We'll start by looking at a couple of images shot the way a good majority of people shoot images. ( thanks to my assistant and co-worker Lynn for helping me with these shots. )


You'll notice in this first shot that Lynn is centered in the image and fills the frame. Not bad. It's your typical, "Hey, let me take you picture for my scrapbook shot."


At this wider angle we see Lynn again centered in the frame. Not bad if you want to get the wall. ( We'll cover shooting the subject in another lesson.)

This is what a bazillion of your images look like in your photo albums I bet. Nothing wrong with them, but it's always the same shot with the subject in the middle.

The rule of thirds says ( from Wikipedia )

The rule of thirds is a compositional rule of thumb in visual arts such as painting, photography anddesign.[1] The rule states that an image should be imagined as divided into nine equal parts by two equally-spaced horizontal lines and two equally-spaced vertical lines, and that important compositional elements should be placed along these lines or their intersections.[2] Proponents of the technique claim that aligning a subject with these points creates more tension, energy and interest in the composition than simply centering the subject would.


This tension ads interest although I probably wouldn't call it tension. I'd rather call it interest from unbalance. Take a look at the shots below and see if you can notice a difference in interest.


Granted these aren't the most intersting portraits in the world, but they are more visually appealing.

How does this work?


What we are trying to do first is divide the potential image up into 9 equal size boxes like in the image above. Then we try to place the subject - our subject is WHY we're taking the picture - on those lines. We can frame the image portrait or landscape.

When we line up a shot, we mentally have been programmed to put the subject in the middle of the shot. Our thought is, "Get the subject at all cost."

However, if you look at a good many portraits you will notice many of them the subject is on this rule of thirds. Below are some images from the internet with the lines in them to give you an idea of where the subject falls in the rule of thirds.