Lots of us take good shots. We do, we just don't know it. What I'd like to tell you is what a number of photographers do to make the pictures they take of you look better. And the better the picture the more sales they get. Right?
I'm going to take you through a sample picture process. That process is referred to as "workflow" in the "bid-ness". Workflow is taking an image and correcting pieces, parts or the whole to get a better finished product. It's what used to be known as "re-touching". Re-touching was difficult in that it dealt with a piece of paper and different airbrushing techniques or very inaccurate methods to correct or hide flaws.
I can't show you everything, but I'll show you a few things I do to make a good picture look better. Keep in mind that if you expose the picture properly and set the subject as the subject and are aware of what's going on in the frame, you usually don't have to do much to the picture. You really try to do as little as possible to the picture. The general rule of thumb is to remove problems BEFORE you shoot. We'll take one image and follow it through 3 things I do to give an image a better look. I'll be using Photoshop to do my corrections.
You can use just about any image editing tool. If you can't get your hands on Photoshop, tools like Paint.Net, The Gimp and Photoshop Elements have these basic features. In all of our examples, we will use the photo below. If you would like to download it and try the corrections I demonstrate, you can find it here.
Not a bad picture. The model is nice, the setting is not distracting, but it needs a little work. Let’s do 3 corrections on this image.
- Color Correction
- Dodge/Burn
- Vignette
Color Correction
Let's face it, sometimes the lights or the fates or whatever work against you. Sometimes it can be the color of the subject's skin that can clash with the surroundings. Color correction is a way to get a good balance of rich colors. The first thing I'm going to do is try to correct the colors in this image. They look pretty good, but I want to take some of the yellow out of the model’s skin and balance the purple from the background.
First you open your image editing software and the image and immediately make a copy of the background layer. We always want to be able to go back to the original.
Now that we have a copy of the image ready to work with on a new layer, our first stop is going to be to go to edit the levels. In Photoshop and choose Images –> Adjustments - >Auto Levels. This will balance out the darks and light areas of the image. If you don’t like it choose CTRL + Z or on the Mac Command Z.
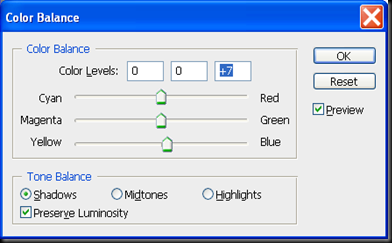
Now that our dark and light balance is good, let’s work on colors. I like to start with the Color Balance tool ( CTRL+B or Command+B on a Mac ). Color Balance works colors against each other. In our photo we want to reduce the yellow tone in the model’s skin.
For each setting at the bottom ( Midtone, Shadow and Highlight ) I’m going to bump up the blue just a tad. You;ll notice the wall changes too. If you don’t want to change the color of the wall you would use the Hue/Saturation tool. ( CTRL+U ) We could go on for days like this, but for now I’m going to stick with the Color Balance.
Here’s what we have so far. Our model’s skin is less yellow and the wall is a little more purple as it was in real life. We’re already seeing an improvement.
Dodge/Burn
Now let’s tackle making the image more attractive to the viewer. What we are going to do is use an OLD technique that lightens or darkens small areas of the image. When you want an area lighter it’s called “dodging”. When you want an area to be darker it’s called “burning”. What we want to do is make the eyes and teeth brighter. Especially the eyes without making them look plastic. All I’m going to do is dodge around the eyes and once over the teeth. Our model has nice teeth and we don’t have to do much to correct there.
At the top use the following settings as an example.
Now, with one pass, click and drag over the darker parts of the eyes:
It’s not much of a difference but it will make the eyes lighter and focus attention on the eyes.
Vignette
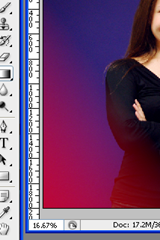
A vignette is a way to isolate the subject in a way that mimics a camera darkening the edges of an image. Old images get darker toward the corners. New digital cameras don’t do that. We’ll use the mask tool. I’m not going to explain it too much but give you the steps.
1. Click “enter mask mode” on the tool bar
2. Choose the Gradient tool on the toolbar
3. Draw from each corner about halfway to the middle of the image.
A red gradient will appear – this is normal. Continue with each corner. 
5. Press CTRL+SHIFT+i ( this inverts the selection )
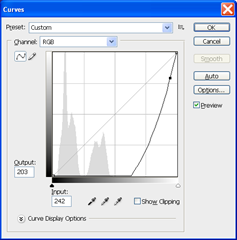
6. Press CTRL + M
This gives you the curves options. Click about 1/3 of the way toward the top of the curve and drag up until you see some dark areas in the image. It will probably will look something like this.
Before 
After 
Click CTRL+D to deselect the areas. You should have something like this. 
Let’s take a look at the before and after.
Better colors, more focus on the subject.


